OverviewOften, capabilities of PXI instrumentation is enhanced over the life of the product. Sometimes those enhancements are as a result of changes or improvements to the instrument drivers and/or controlling software. But many times those improvements are in the form of new hardware capabilities via the instrument firmware. The firmware may fix bugs that were identified after the product was delivered, or may introduce altogether new capabilities. In these cases, it is preferred that the new firmware be updated, or flashed, in the field, rather than returning the instrument to the factory. This minimizes down time associated with shipping to and from the factory, and allows immediate feedback as to the effectiveness of the upgrade.
Instruments produced by Marvin Test Solutions support field upgrades to the firmware, and from time-to-time, new firmware is released for Marvin Test Solutions (MTS) products. This document explains how to flash the firmware in the field for those MTS instruments that support this capability. The process for flashing firmware on MTS instruments is essentially the same from product-to-product, so this document will use the GX5292 Digital IO (DIO) instrument as a representative example for how to flash firmware for all MTS instruments.
Upgrading FirmwareStep 1: Request the new firmware file from Marvin Test Solutions. The best method to do so is to open a Magic support ticket, accessible from the Marvin Test Solution’s web page under the “Support” link (Figure 1, below), and request the firmware file. Using Magic requires an MTS User Account. It is free to sign up and requires only some basic information so we know who you are and how to contact you for support follow-up.
 Figure 1 Figure 1: Magic support link
Step 2: Launch the instrument's virtual panel. For the GX5292, this is the DIO Panel (Figure 2, below), which is included in the instrument’s software installation package.
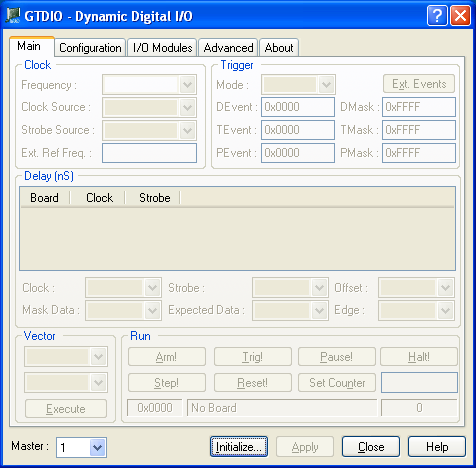 Figure 2 Figure 2: GX5292 instrument panel
Step 3: Initialize the instrument by selecting the hardware you wish to initialize. For the GX5292, click on the “Configuration” tab located at the top of the instrument panel, and enter your instrument list. This may be a single instrument (Figure 3, below), or multiple instruments configured as a Master/Slave domain. If necessary, you may need to select the instance of the instrument you want to initialize. For the GX5292, and most other MTS products, you specify the instrument by its PXI slot number. Click on the Initialize button.
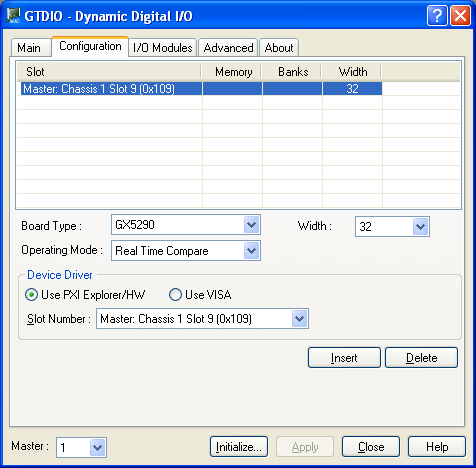 Figure 3 Figure 3: Initializing the instrument
Step 4: Once the instrument is initialized, click on the About tab. The About page displays useful information about the instrument, such as the driver revision, the instrument serial number (some instruments do not include this information), the firmware revision, and the Upgrade Firmware button (Figure 4). Click on the Upgrade Firmware button. Using the navigation window, select the firmware file that was provided to you. Before committing to the upgrade, you will be provided a final opportunity to cancel the firmware upgrade process (Figure 5). Click on Yes to continue with the firmware upgrade.
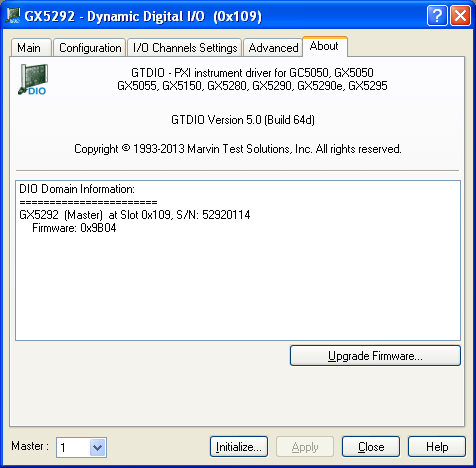 Figure 4 Figure 4: The "About" page
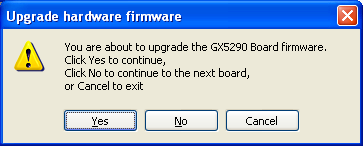 Figure 5 Figure 5: Update Firmware confirmation
During the firmware upgrade process, the status of the upgrade (erasing old firmware, programming new firmware and verifying new firmware) will be displayed (Figure 6). It is very important that the process not be interrupted or chassis power removed during the upgrade process – especially after the old firmware has been erased. It is possible that the instrument would be left without a valid firmware installed, rendering the instrument useless. If this were to happen, then the instrument can be returned to the MTS factory in Irvine, California, where a new firmware image can be installed on the instrument. Request an RMA via your Magic incident.
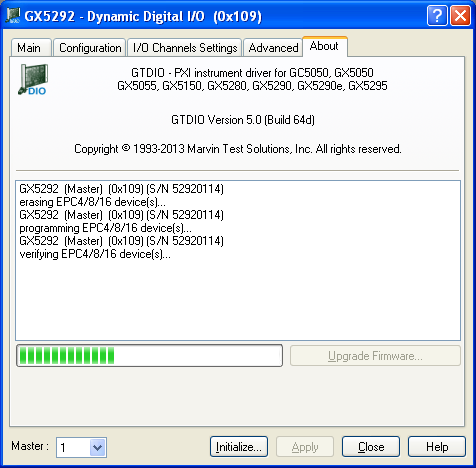 Figure 6 Figure 6: Firmware update status
At the conclusion of the firmware upgrade, a message will be displayed indicating that the firmware upgrade was successful (Figure 7).
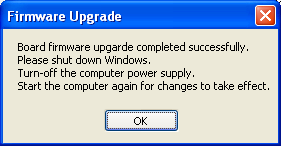 Figure 7 Figure 7: Firmware update completed
Step 5: At this time, the instrument EEPROM has been upgraded and contains the new firmware image, but the instrument FPGA still retains the logic represented by the old firmware, which was loaded during the chassis power up sequence. To begin using the new firmware, it is necessary to run the PXI chassis through a full power cycle. Shut down all open applications, and then shut down the Windows OS. If the PXI chassis is still running after Windows terminates, cycle chassis power to OFF. Allow the chassis to remain off for several seconds to provide sufficient time for all backplane power voltages to dissipate, and then cycle the chassis and the host PC power to ON.
On older Windows OS’s, you may receive a New Hardware Found message. This is normal as the Windows registry retains the old firmware key. Follow the normal new hardware found installation procedure to update the registry with the new firmware information. Run the instrument virtual panel and initialize the instrument as before. The About tab should now indicate the new firmware version.
At this point, the instrument is ready to use with the new firmware functionality.
|