OverviewIn this example we demonstrate how to setup source control for a project in ATEasy 9.0 using Git source control. Features include the ability able to add, check in/out files, view history and check differences between repository history files.
Download and Install GitDownload and install Git from the Git website: http://git-scm.com/downloads. The Git GUI can be used to view your files and edits with a broad spectrum of applications, but we will focus on using Git for ATEasy source control.
Creating WorkspaceWe will open ATEasy and create a new workspace called SourceControlExample.wsp. You can place the workspace within your own projects folder, in a folder on your desktop or in some other folder.
Adding Project to WorkspaceInstead of creating our own project we will use one that already exists. We use the Forms project and program located in the ATEasy Examples folder (on x64 machine C:\Program Files(x86)\ATEasy 9.0\Examples\). Copy the Forms.prj and Forms.prg to your project folder located in the SourceControlExample.wsp.
Click File->Open and Forms.prj in your folder. This will open the project and program file in your workspace.
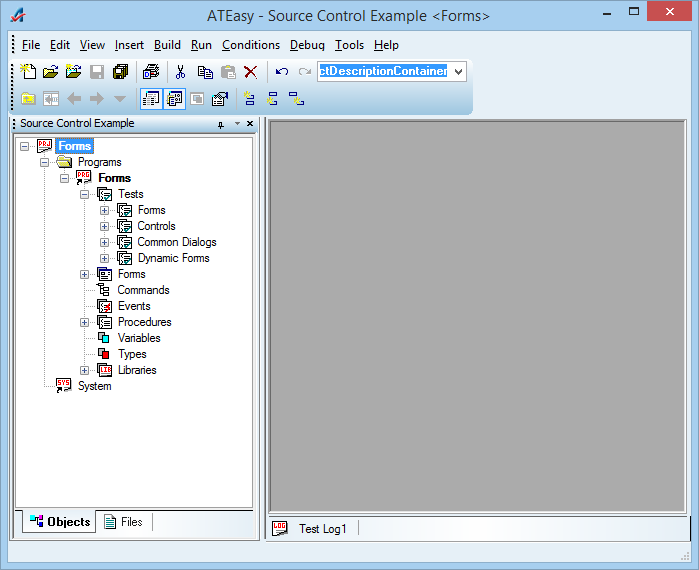 Figure 1 : Open Forms Project in SourceControlExample Workspace Figure 1 : Open Forms Project in SourceControlExample Workspace
Setting up Source Control OptionsTo setup Source Control in ATEasy click Tools->Options. Go to the Source Control tab and choose what type of Source Control you are using. In this example we are using Git. Choose where the source control client executable (.exe) file is located.
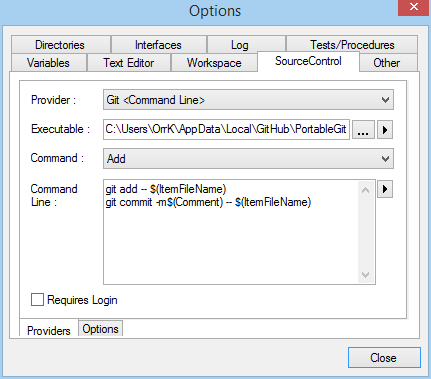 Figure 2 : ATEasy Source Control Options Figure 2 : ATEasy Source Control Options
Adding Files to Source ControlEach ATEasy file in the workspace can have the following icons in addition to the blue color indicating that the file belongs to source control:
 file checked out by the current user file checked out by the current user
 file checked out by others file checked out by others
 file checked out by multiple users file checked out by multiple users
Click on the Forms project to select it. We will now add the Files to Source Control, creating a saved base before we make any changes. Click File->Source Control->Add
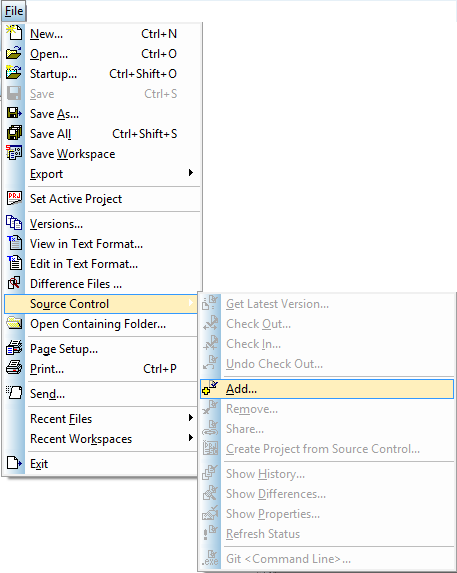 Figure 3 : Initial addition of files to Source Control Figure 3 : Initial addition of files to Source Control
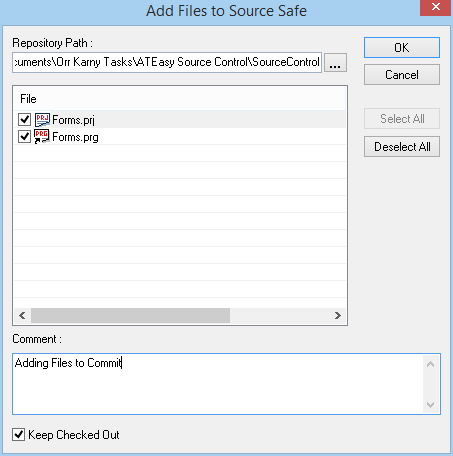 Figure 4 : Add Forms Project and Program to the Source Control Figure 4 : Add Forms Project and Program to the Source Control
After the window above pops up select both the .PRJ and .PRG files and add a comment to the commit. The comment will allow you easily distinguish commits from each other. Try to use short phrases that describe what changes you made to the files. Finally click OK and the Source Control Log will pop up and show the Git commands that are being called to commit the files to your source control.
The Workspace window in ATEasy changes after a Check In is made.
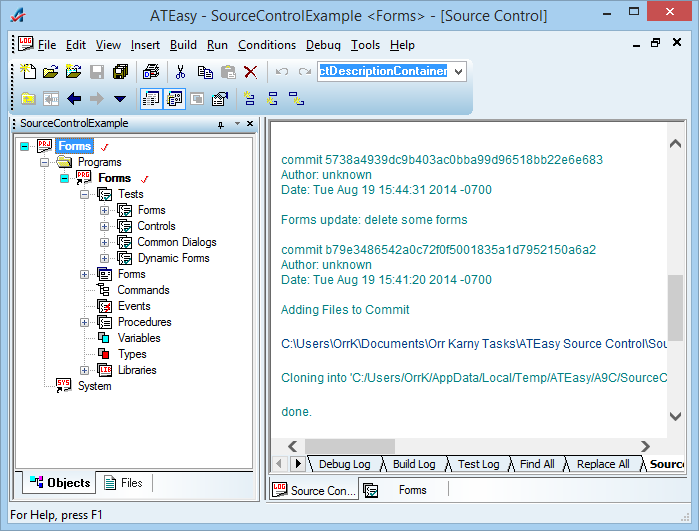 Figure 5 : Workspace After Source Control Check In Figure 5 : Workspace After Source Control Check In
Viewing Repository Path of a FileThe repository path can be viewed by opening the properties of a file in ATEasy and going to the Source Control tab. In this example we went to the Forms.prg properties.
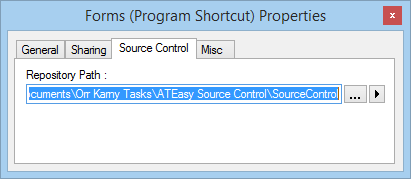 Figure 6 : Source Control Properties Figure 6 : Source Control Properties
Making and Committing Changes to Source ControlWe will make a change so we can see how the history and differences work. In the forms program, open and maximize the Forms so we can view all the forms that are available. Now highlight over a few forms, delete and save.
Now to commit the changes we have made, click File->Source Control->Check In…
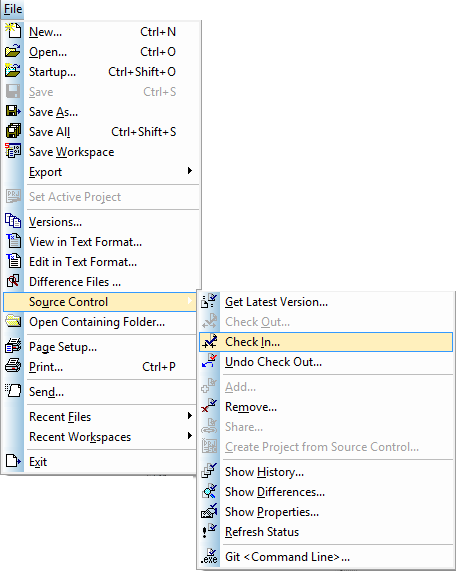 Figure 7 : Check In Updated File to Source Control Figure 7 : Check In Updated File to Source Control
Since we only changed the program only check the Forms.prg. Add a comment to distinguish it from other changes we may have made. Click OK to commit the change into the Source Control.
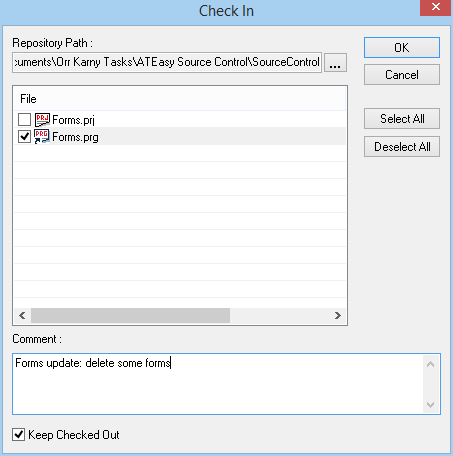 Figure 8 : Update Source Control with Program Figure 8 : Update Source Control with Program
Viewing Source Control HistoryTo view the Source Control History, click to highlight the file you want to check then click File->Source Control->Show History…
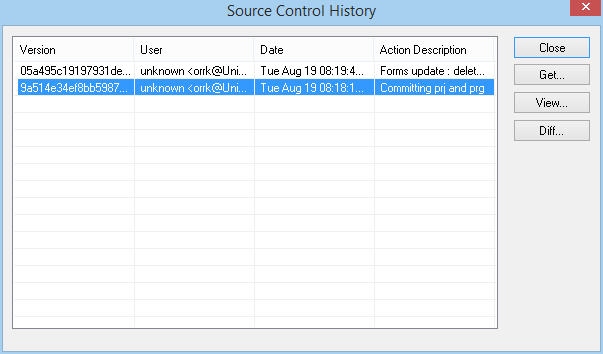 Figure 9 : Source Control History Figure 9 : Source Control History
In the Source Control History window you can view all the commits you have made. Information about the user is displayed, the time they committed the change and the description of the change are all displayed.
Display Source Control DifferencesTo show the differences between the original file and the current file, highlight over the first commit on the bottom and click Diff…
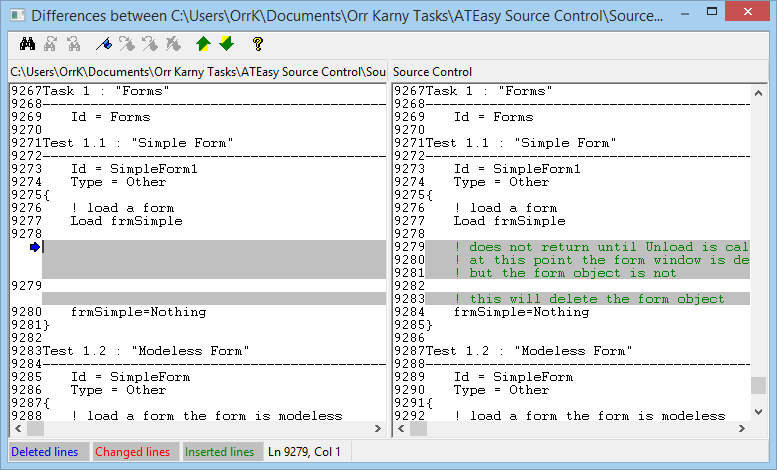 Figure 10 : Difference in Original and Current program files. Figure 10 : Difference in Original and Current program files.
To jump through the differences in the files, click the down arrow. The left side shows the current file and right side shows the file in the source control. As you can see the form was deleted from the original file.
See AlsoThe ATEasy on-line books provide additional information about using source control tools with ATEasy.
|