ATEasy (.drv) DriversAn ATEasy driver provides a way for ATEasy application to communicate with a device or an instrument. The driver can provide command statements and that are used by the application to program the device or instrument. It can also provide procedures, librarries, forms, libraries, variables, types if they defined as public. Once the driver is inserted to the ATEasy system, it must be configured before using it. ATEasy drivers can be implemented using ATEasy code that comprise by procedures or IO Tables, or using an external library such as DLL, ActiveX or .NET. You can also create a driver by importing a function panel driver (.fp), the import will create a DLL based driver. Once the driver is created and inserted to the system, it must be configured. The configuration depends on the driver implementation and there are two main types:
- Interface Based Drivers - Includes GPIB, VXI, COM (RS232), USB, File and more. These driver are implemented using IO Table. A interface based driver can support multiple interfaces, for example if the instrument supports GPIB and USB, the driver properties will show:
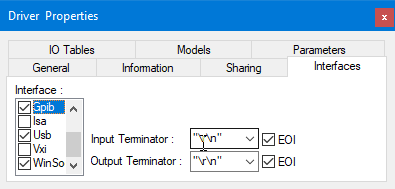 Figure 1: ATEasy Driver Interfaces property page supporting multiple interfaces Figure 1: ATEasy Driver Interfaces property page supporting multiple interfaces
- None Interface Drivers - based on ATEasy code functions
Interface Based DriversInterface based drivers are implemented using an IO Table or the internal API built into ATEasy.
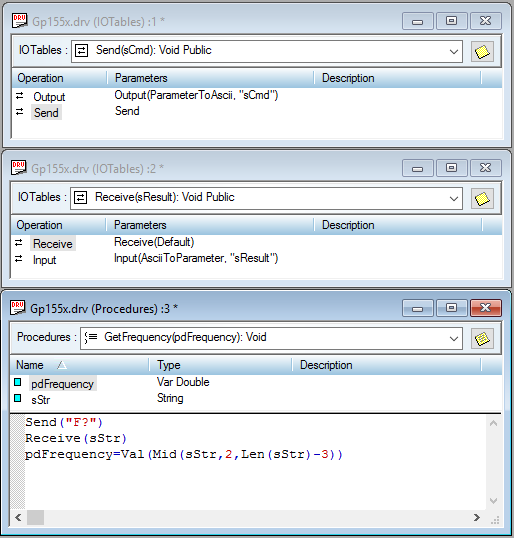 Figure 2: Gp155x ATEasy driver, the procedure GetFrequency() was created using the IO Tables for Send and Receive. Figure 2: Gp155x ATEasy driver, the procedure GetFrequency() was created using the IO Tables for Send and Receive.
Drivers for interface based drivers can also be made using the Internal library. ATEasy has built-in support for hardware interfaces such as COM, GPIB, VXI, USB, and WinSock(TCP/IP).
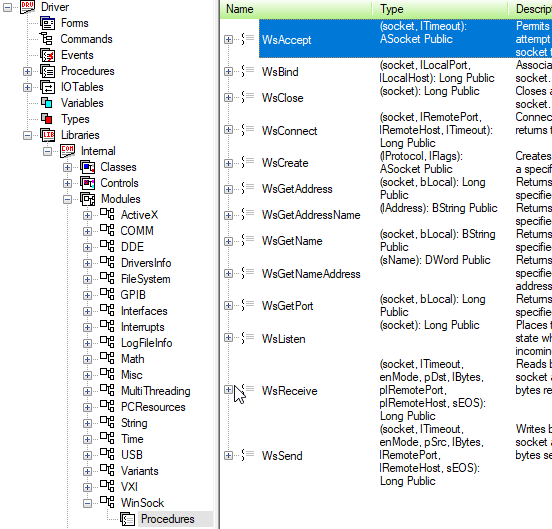 Figure 3: The ATEasy Internal library showing WinSock (TCP/IP) functions Figure 3: The ATEasy Internal library showing WinSock (TCP/IP) functions
Configuring an Interface Based DriverIn this example, we will configure the Ag9xxxx driver for Agilent’s Infiniium Series Oscilloscopes that is provided with ATEasy.
1. Find out what the device's interface is. This can be found in the instrument description:
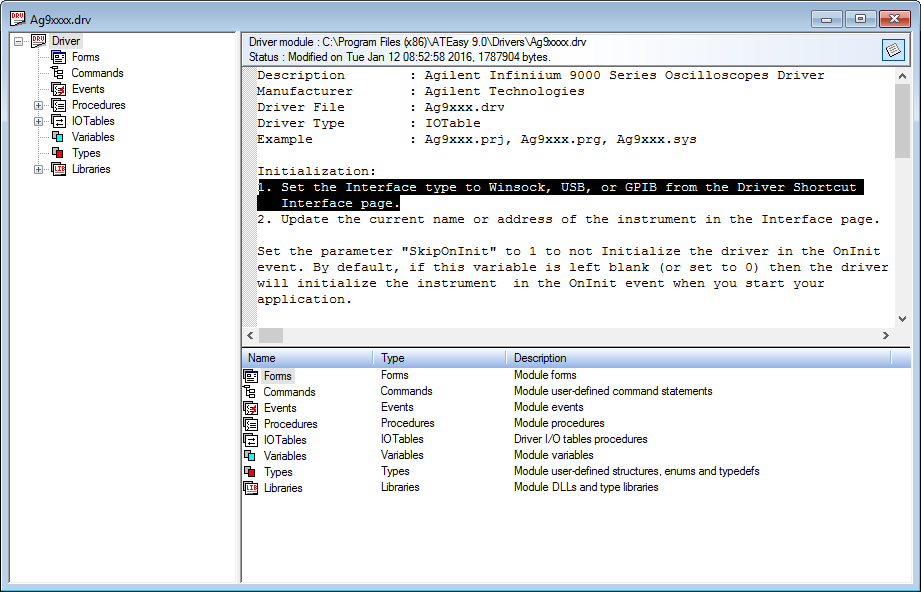 Figure 4: The description states the interface type is Winsock, USB, or GPIB. Figure 4: The description states the interface type is Winsock, USB, or GPIB.
2. Go to the driver's module (not the shortcut!), right click, and go to Properties.
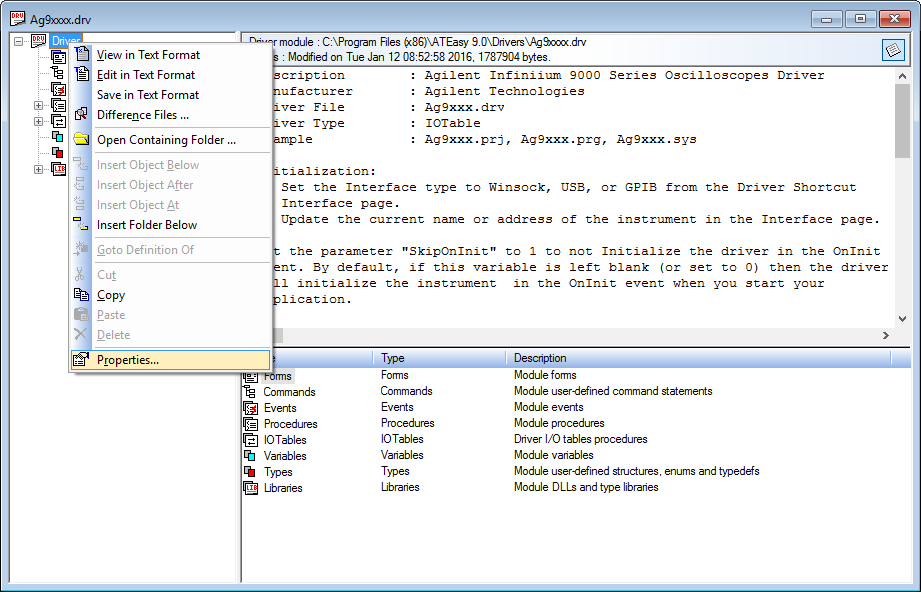 Figure 5: Right click the driver module and select Properties. Figure 5: Right click the driver module and select Properties.
3. Click on the Interfaces tab and check-off the interfaces used.
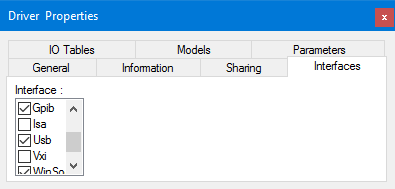 Figure 6: Enable the interfaces supported by the driver. Figure 6: Enable the interfaces supported by the driver.
4. Then go to the driver’s shortcut, right click, and go to Properties.
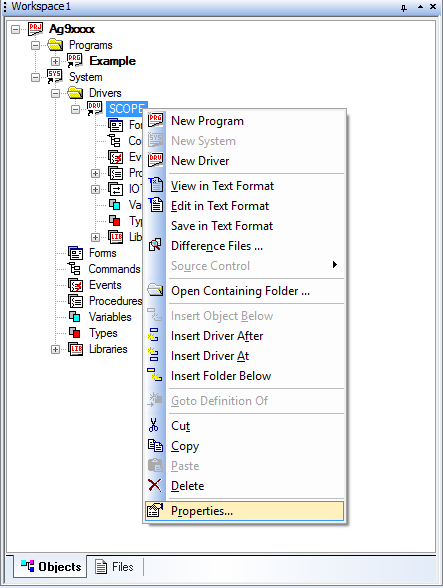 Figure 7: The driver’s shortcut can be found in the workspace view on the right-hand side. Figure 7: The driver’s shortcut can be found in the workspace view on the right-hand side.
5. In the Interfaces tab choose the interface to be used and fill in the required information.
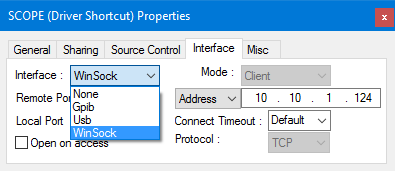 Figure 8: The three interfaces that were checked-off can be chosen here. Figure 8: The three interfaces that were checked-off can be chosen here.
Non-Interface BasedNon-interface based drivers are implemented by inserting libraries/DLLs, importing function panels, or inserting IVI drivers. Non-interface based drivers communicate via a low level abstraction layer, HW or VISA. To configure the driver for communication, the Slot Number or the VISA Resource must be specified.
Configuring a Non-Interface Based DriverMarvin Test Solution's PXI/PCI Explorer can be used to find the slot number or VISA resource of an instrument. That slot number or VISA resource can then be plugged into the driver properties to allow the driver to communicate with the instrument. Below is an example of identifying the slot number of an instrument and then entering it into the driver properties under the Misc tab.
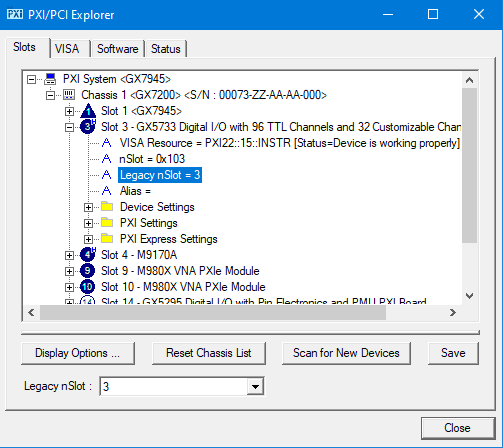 Figure 9: PXI/PCI Explorer - Instrument is in slot 3. Figure 9: PXI/PCI Explorer - Instrument is in slot 3.
Slot number 3 is now placed in the Driver shortcut's Properties, Misc tab as shown below.
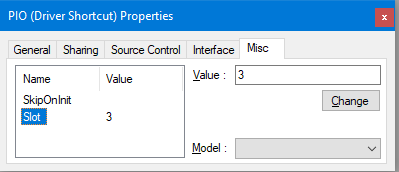 Figure 10: The driver's Properties - Instrument is identified by slot number. Figure 10: The driver's Properties - Instrument is identified by slot number.
Alternatively, you can also identify the instrument by it's VISA resource, as shown below.
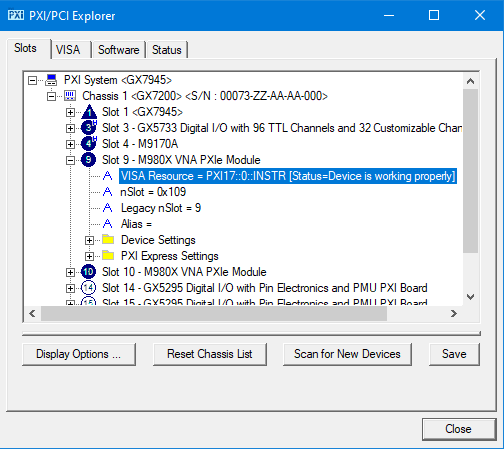 Figure 11: PXI/PCI Explorer - Instrument is VISA resource PXI17::0::0::INSTR. Figure 11: PXI/PCI Explorer - Instrument is VISA resource PXI17::0::0::INSTR.
This VISA resource is then entered into the ResourceName field in the Misc tab of the driver properties window. Shown in figure 12 below.
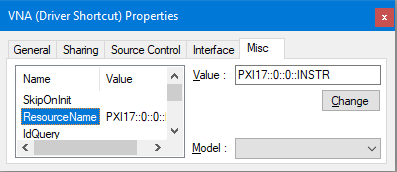 Figure 12: The driver's Properties - Instrument identified by VISA resource. Figure 12: The driver's Properties - Instrument identified by VISA resource. |