How to Use Tortoise SVN With ATEasy1. Download and install TortoiseSVN (x86 or x64 depending on your system) from SourceForge.net. Make sure Command line client tools are installed.
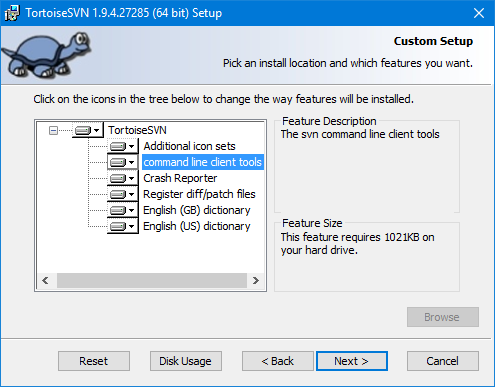 Figure 1: Install TortoiseSVN and make sure the command line client tools are installed. Figure 1: Install TortoiseSVN and make sure the command line client tools are installed.
2. Using Windows explorer, create a folder to host the repository (local or server). Right click the newly created folder and select TortoiseSVN and select Create Repository Here. Click on Create folder structure.
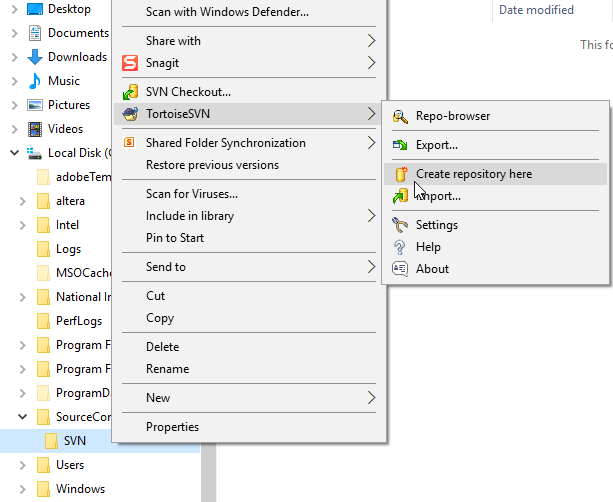 Figure 2: Creating a TortoiseSVN repository. Figure 2: Creating a TortoiseSVN repository.
3. Open ATEasy, select Tools, Options, then the Source Control tab. In the drop-down box select Subversion. Make sure the executable is correct; if not, locate the file and update the Executable field. Click Close and confirm your selection.
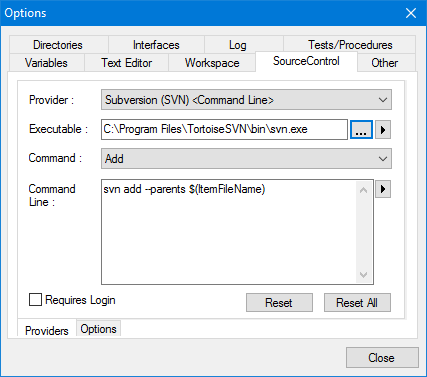 Figure 3: Select the TortoiseSVN executable. Figure 3: Select the TortoiseSVN executable.
4. Open a workspace and select the project you wish to add to the source control repository. Right click on the Project from the workspace window and select Add:
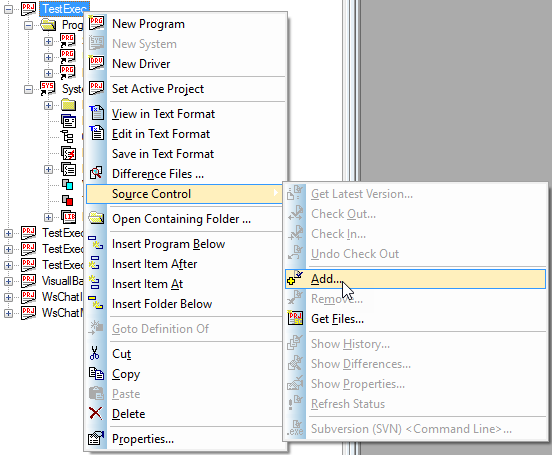 Figure 4: Add your project to the Source Control Repository. Figure 4: Add your project to the Source Control Repository.
5. In the Add Files to Source Control dialog do the following:- Type in the Repository Root (server or local folder where you created the repository).
- Type in the Subfolder - usually the project name where the added files will be stored in the repository.
- Type in the Working Copy Folder - the root folder for your local files where the project resides. Note that all of the Added files should be located below this root folder.
- Check the files that you want to add. Note not to select files that reside in a folder outside of the working folder.
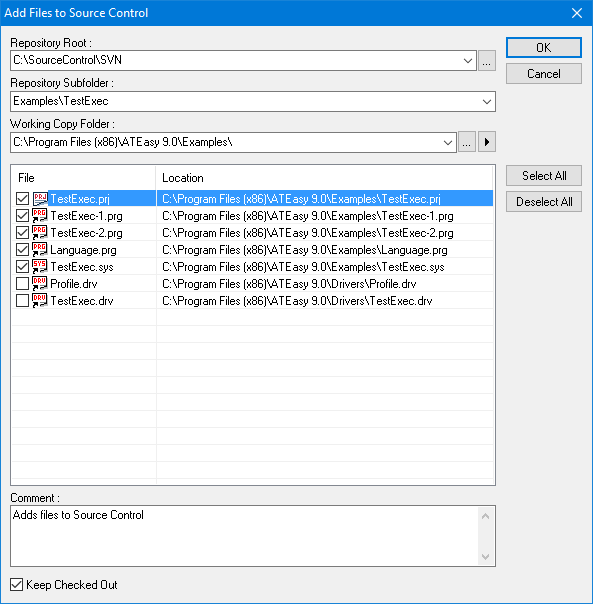 Figure 5: Add Files to Source Control. Figure 5: Add Files to Source Control.
Next, click OK to add the files. You will get the following message if TestExec Subfolder in the repository does not exist.
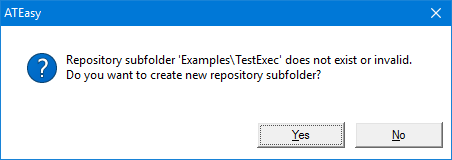 Figure 6: Subfolder if the repository does not exist. Figure 6: Subfolder if the repository does not exist.
Click Yes to add the files to the repository and put them under source control (shown in Cyan color in the workspace window). The files are also checked off as shown here:
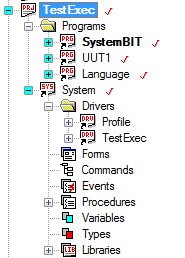 Figure 7: Files under source control have check marks. Figure 7: Files under source control have check marks.
Note: The Log window's Source Control tab will show all the commands invoked by ATEasy that perform the operation (Add Files in this case). This log can also be used to troubleshoot the operation in case of issues due to a wrong command line configuration set by the Options dialog or wrong parameters invoked by ATEasy. The command reply is also visible. The Log window is color coded so that commands invoked by ATEasy show in blue, replies from the source control tool show in green, and error replies show in red.
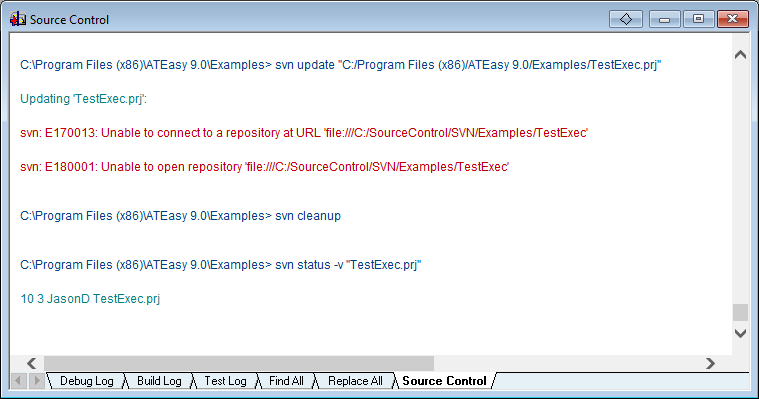 Figure 8: The Log window Source Control tab. Figure 8: The Log window Source Control tab.
Note: The information about the repository and the local working folder is saved in the ATEasy Workspace file used when you added the file to the source control repository.
6. You can check the latest status of the file in the source control repository using the Source Control > Show Properties command.
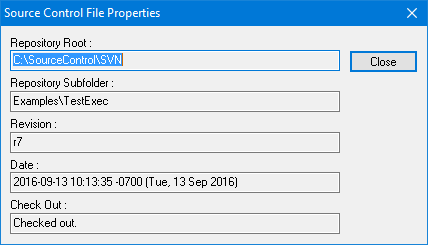 Figure 9: Source Control File Properties. Figure 9: Source Control File Properties.
7. To add the other files that reside under the Drivers folder, repeat steps 4 and 5. Select the Profile and the Test Exec drivers and add them to the repository under the Drivers subfolder and C:\Program Files\ATEasy 9.0\Drivers working folder.
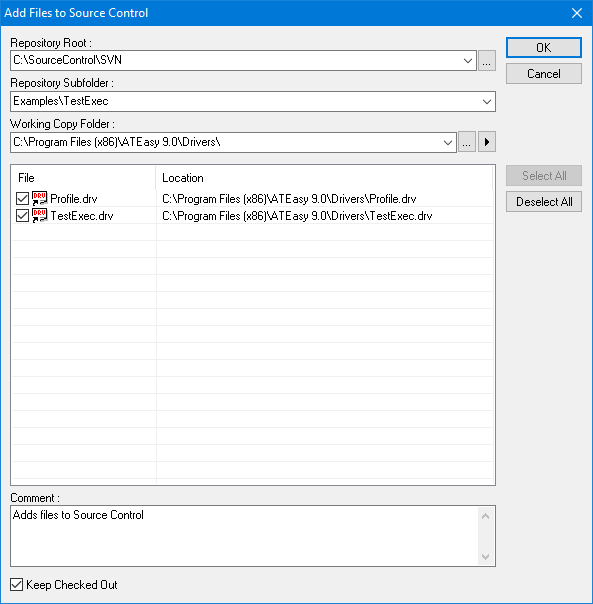 Figure 10: Add the Other Files that reside under the Drivers folder. Figure 10: Add the Other Files that reside under the Drivers folder.
At this point all the project files are added and checked off as shown here:
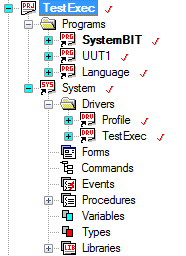 Figure 11: All project files are added and checked off. Figure 11: All project files are added and checked off.
8. You now can make changes to the files , save them, and when ready, re-check the files in. For example, change the TestExec1.prg and check it in. You can also add a comment to describe the changes made as shown here:
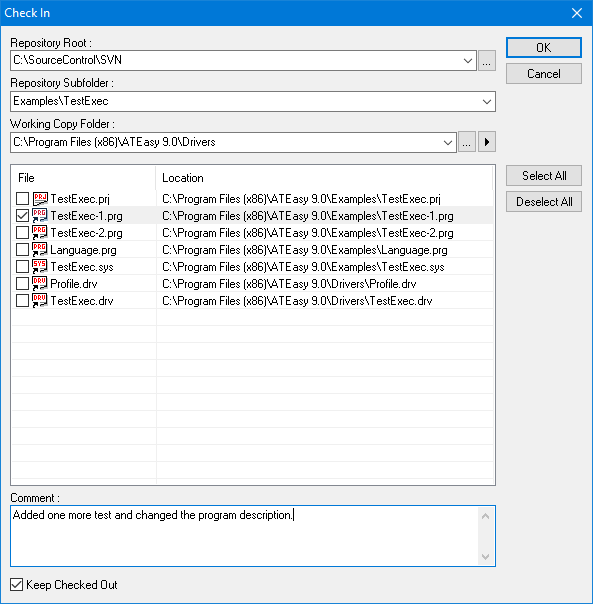 Figure 12: Check In. Figure 12: Check In.
9. You can open the Source Control History dialog and see all the file revisions that were checked in, including the revision number, the user, the date and the comment:
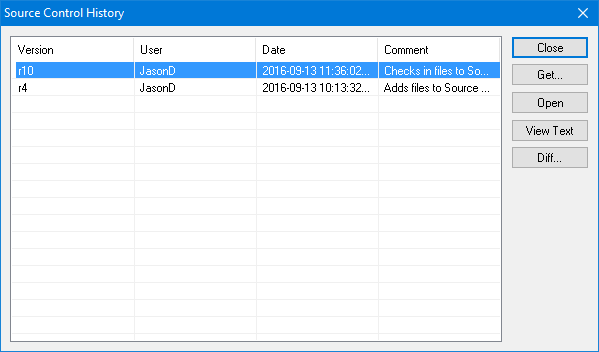 Figure 13: Source Control History. Figure 13: Source Control History.
You can select the revision you need and then click on Get to copy that revision to add to a selected folder:
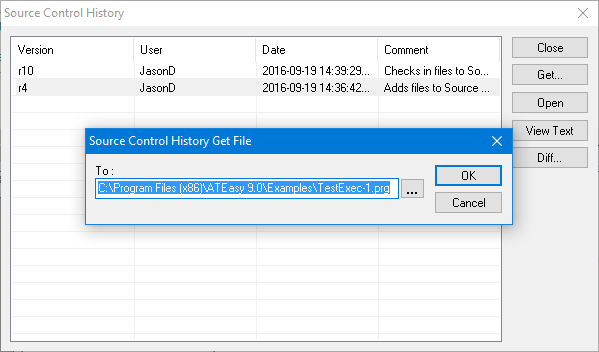 Figure 14: Get a copy of a revision. Figure 14: Get a copy of a revision.
Use Open to open that revision in ATEasy, View Text to view the revision in text mode, and Diff to show the difference between the revision and the version you have selected as shown here:
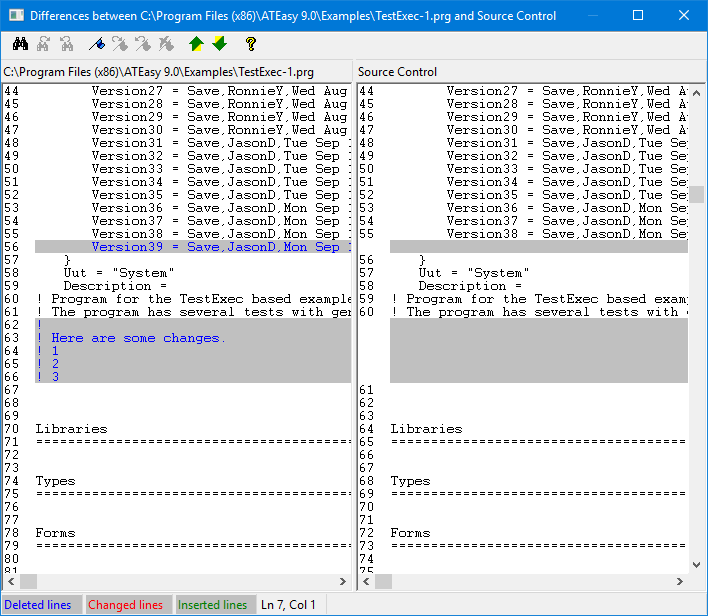 Figure 15: Use Diff to show the difference between the revision and the version you have. Figure 15: Use Diff to show the difference between the revision and the version you have.
10. The Get Files operation is useful when you no longer have the files locally and you want to retrieve them from source control. To get files from the repository, right click and go to Source Control > Get Files.
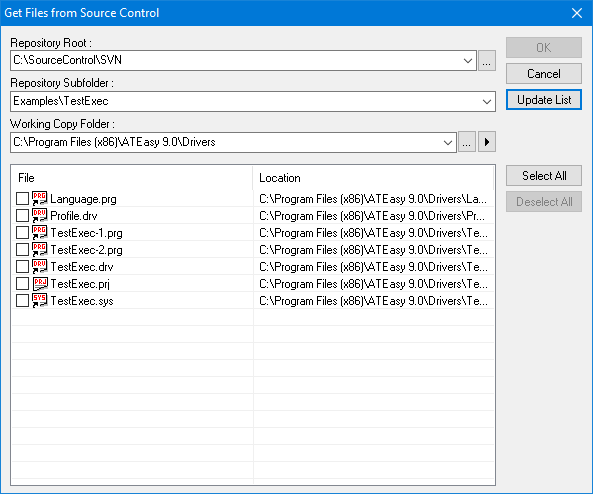 Figure 16: Get Files from Source Control. Figure 16: Get Files from Source Control.
|